Logo

Autoschematic

Installing Connectors

Autoschematic on its own can't do much - you'll need to install connectors to begin managing resources declaratively. Connectors are like providers in Terraform; each connector manages a particular class of resources. For example, the aws/iam connector manages AWS IAM roles, users, groups, and policies. The snowflake connector manages Snowflake databases, schemas, tables, and other associated resources.

To install connectors, you'll need to add an entry to the connectors field of the prefix in which the connector will run. You can browse the Connector Catalogue to explore connectors. The connector catalogue will also provide a config snippet for you to save you some time.

Browsing the Connector Catalogue

The Connector Catalogue is a central list of all the officially developed connectors.

Each entry in the catalogue provides a config snippet to drop in your autoschematic.ron file, like so:
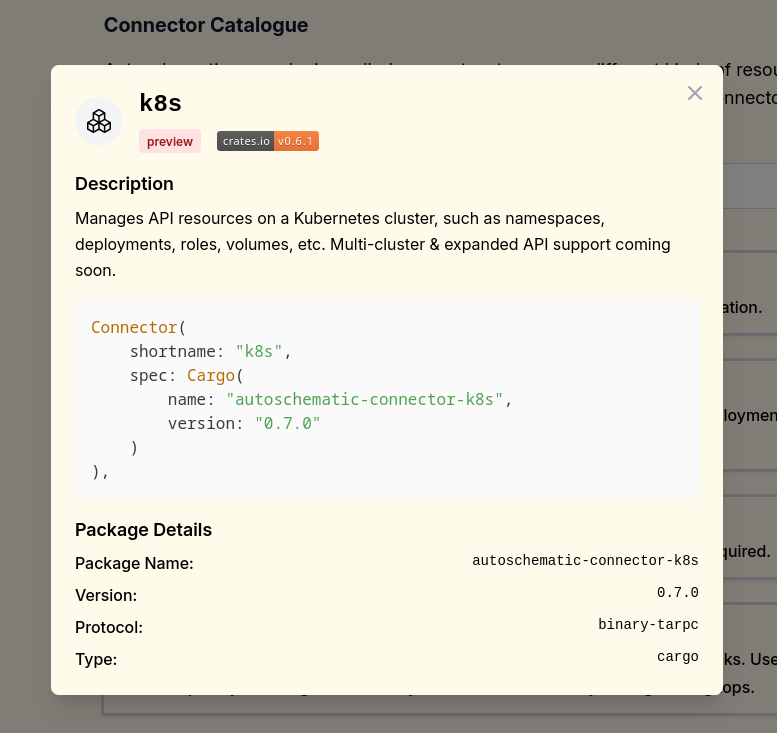
Note that most connectors are still in beta. Rough edges are to be expected!

Once you've added the entry to the connectors array for a prefix, you can download and install the new connectors by running autoschematic install.

A Config Example

If we had a single prefix called "main", and a single connector, the "aws/iam" connector, our complete autoschematic.ron file might look like:

AutoschematicConfig(
    prefixes: {
        "main": Prefix(
            resource_group: "main",
            connectors: [
                Connector(
                    shortname: "aws/iam",
                    spec: Cargo(
                        name: "autoschematic-connector-aws-iam",
                        version: "0.9.0"
                    )
                )
            ]
        ),
    },
)

Likewise, if we had two prefixes, "backend-team" and "data-team", and multiple connectors in each, our full config might look a little more substantial. Notice that we've even added some environment variables to each connector in order to configure them. Environment variables set in your shell are not automatically passed through to connectors for security. You must explicitly pass them through with the "env://..." syntax as shown below.

AutoschematicConfig(
    prefixes: {
        "backend-team": Prefix(
            resource_group: "main",
            connectors: [
                Connector(
                    shortname: "aws/ecr",
                    spec: Cargo(
                        name: "autoschematic-connector-aws-ecr",
                        version: "0.9.0"
                    )
                    env: {
                        "RUST_LOG": "INFO",
                        "AWS_ACCESS_KEY_ID": "env://AWS_ACCESS_KEY_ID",
                        "AWS_SECRET_ACCESS_KEY": "env://AWS_SECRET_ACCESS_KEY",
                    }
                ),
                Connector(
                    shortname: "aws/s3",
                    spec: Cargo(
                        name: "autoschematic-connector-aws-s3",
                        version: "0.9.0"
                    )
                    env: {
                        "RUST_LOG": "INFO",
                        "AWS_ACCESS_KEY_ID": "secret://backend-team/secrets/aws/s3-id.sealed",
                        "AWS_SECRET_ACCESS_KEY": "secret://backend-team/aws/s3-key.sealed",
                    }
                )
            ]
        ),
        "data-team": Prefix(
            resource_group: "main",
            connectors: [
                Connector(
                    shortname: "zendesk",
                    spec: TypescriptLocal(
                        path: "/home/pete/prog/connector-dev/autoschematic-connector-zendesk/src/index.ts",
                    ),
                    env: {
                        "ZENDESK_SUBDOMAIN": "otterland"
                        "ZENDESK_USERNAME": "secret://data-team/secrets/zendesk/username.sealed",
                        "ZENDESK_API_TOKEN":"secret://data-team/secrets/zendesk/api_token.sealed",
                    }
                ),
                Connector(
                    shortname: "aws/s3",
                    spec: Cargo(
                        name: "autoschematic-connector-aws-s3",
                        version: "0.7.0"
                    )
                    env: {
                        "RUST_LOG": "INFO",
                        "AWS_ACCESS_KEY_ID": "secret://backend-team/secrets/aws/s3-id.sealed",
                        "AWS_SECRET_ACCESS_KEY": "secret://backend-team/aws/s3-key.sealed",
                    }
                )
            ]
        )
    },
)

Maybe you've even noticed the secret://... entries in some of those env vars above. These are references to sealed secrets within the repository. Sealed secrets require a remote cluster to use. Clusters will be discussed in later guides. If you're running Autoschematic locally, secret://... values will be automatically replaced with your shell's environment variables in a pass-through fashion. Other environment variables will not be passed through unless specified.

Now that we've covered the basics of configuration, you can try out the In-Depth Examples!.